
I'm here today to show you how to decorate hibiscus cookies, like the ones I included in my Luau dessert buffet last weekend. I received lots of sweet comment regarding these cookies, and I'll admit I find them pretty special too. The decorating process involves several steps, but none of them are too complicated, and I think that many of you will be able to produce some beautiful cookies as well.
Note: I already have a tutorial on making the pineapple cookies (like above) HERE
First off, I don't have a hibiscus cookie cutter... so I took a four leaf clover cookie cutter, and used some pliers to shape it into something resembling a hibiscus! =)
Now, you'll need to prepare some cookie dough (my recipe is HERE), chill the dough well, bake and then cool.
Prepare some royal icing (I use THIS recipe). You'll want to have a bag (or bottle) of icing in a thick consistency and one in a thinned (flood) consistency for each color.
Prepare your work area (HERE is what mine looks like).
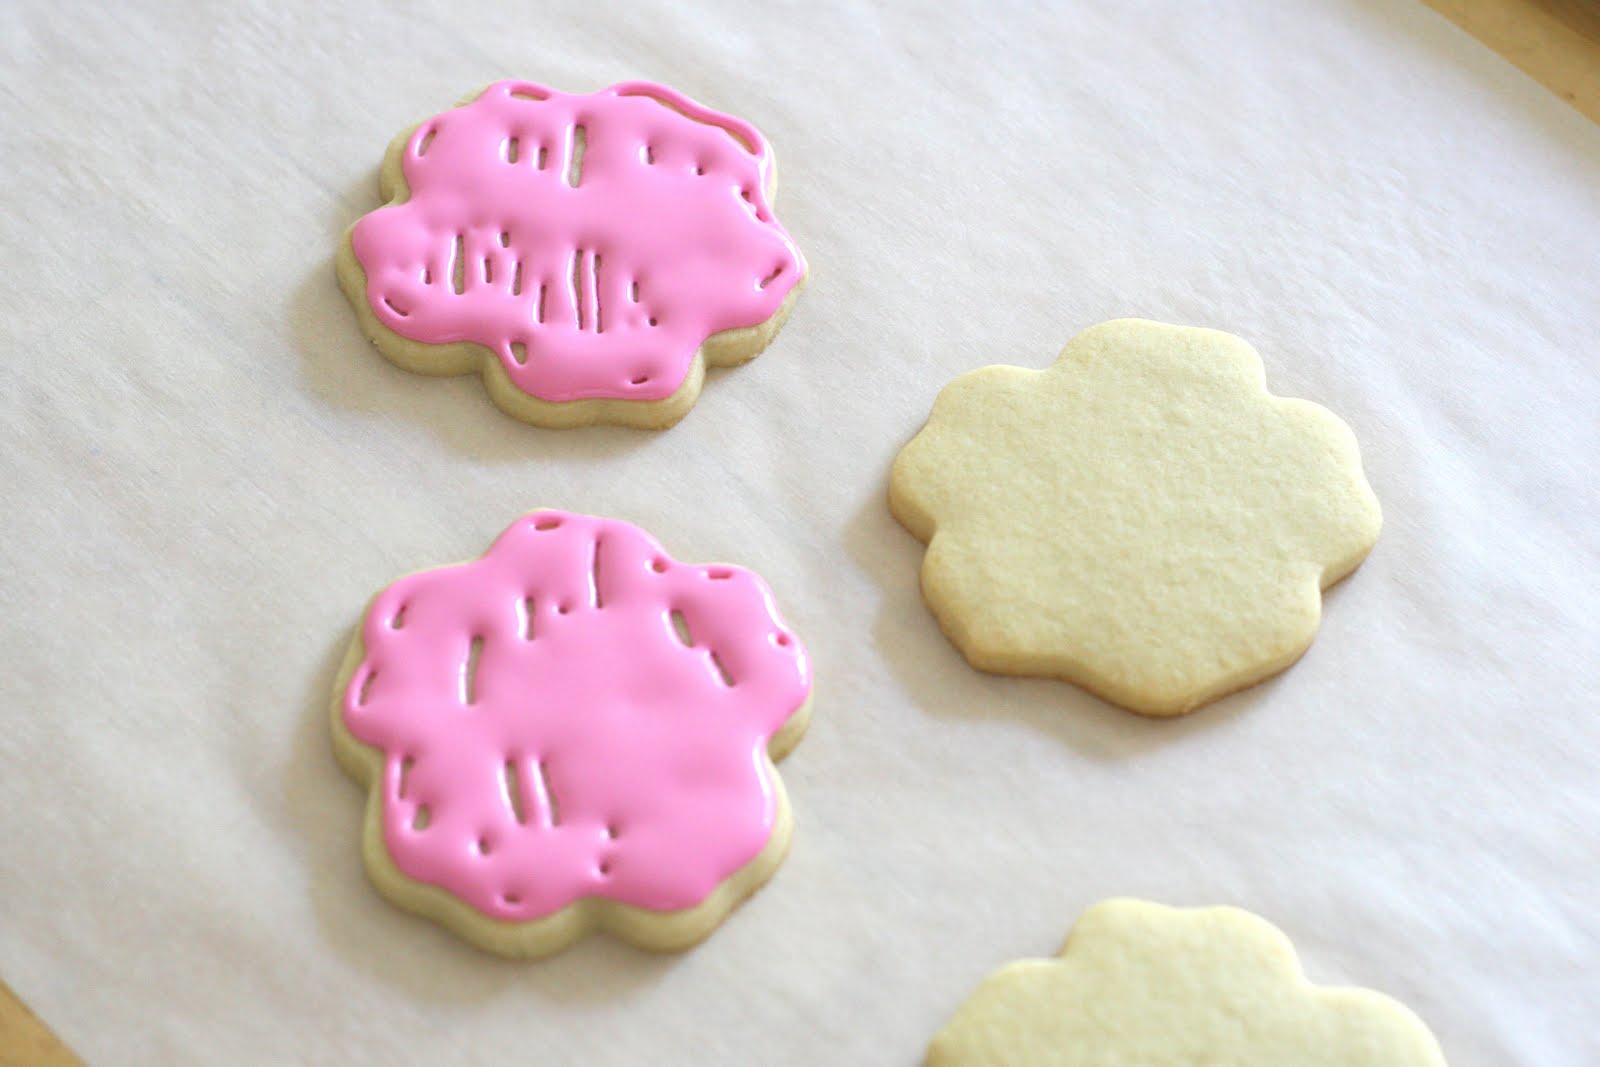
Outline the cookie with a flood consistency icing (this can also be done with the thick consistency icing, but I prefer the seamless look of outlining and flooding in the same icing). You'll have to experiment a bit to make sure your flood consistency icing is not so runny it just falls right off the cookie.

Fill in cookie with the same flood consistency icing. Use a toothpick to direct the icing into any unfilled areas.
Use a flood consistency icing in a contrasting color to make a starburst shape in the center of the cookie.


Drag a tooth pick from the center of the cookie toward the outside (but not all the way to the edge).

Continue around the cookie until the desired design is achieved.

It should look something like this...

Now before this next step you need to let the icing dry for several hours or overnight. The reason is, in a couple steps we'll be adding some sprinkles to the stamen (the thing that sticks out from the center of the flower). If your base coat is not dry, the sprinkles will stick all over the cookie, and not just on the stamen where they belong. If you are really pressed for time (or just impatient) you could just let the cookie dry an hour or so, and then continue with the stamen, but not include sprinkles on the stamen at all.
Note: The parts that stick out of the center of the hibiscus actually include the stigma and the stamen, but I'll just use the word stamen for simplicity.
When base icing on the cookie is dry (or mostly dry if you're not adding sprinkles), pipe a line of thick consistency icing (using a #2 tip) to form the stamen (as shown below).

With the same icing, add some thickness to the end of the stamen, and then pipe some small dots around the end (as shown). I also added some white dots on top of the thicker end of the stamen (optional).

While the line and dots are still wet, hold the cookie over a paper plate (to catch the excess) and sprinkle some yellow non pareils sprinkles on the end of the stamen.

Finish the cookie by outlining in a thick consistency icing.

Once they are completely dry, these can make a gorgeous addition to any luau party.

Happy Decorating!
You make it looks so easy! They are very pretty.
ReplyDeleteI agree with Rach...you make it look incredibly easy! I'm typically a cake-decorating-kinda-girl, but I've been wanting to give cookies a try. I think with the help of your tutorial I just may be able to pull it off! Thanks so much for sharing! :)
ReplyDeleteThese are really so pretty. I love them. :)
ReplyDeleteI love your cookies!!
ReplyDeleteThank you Glory!! Those are truly a masterpiece.
ReplyDeleteLove Love Love your cookies! Beautiful..
ReplyDeleteI haven't taken the plunge on royal iced cookies, but one day I will. Meanwhile, I live vicariously through you, LOL.
Thanks for sharing.
LOVE all of the Luau cookies (can I buy them for my DH's party???)
ReplyDeleteNow I am craving cookies
I love all of your ideas. Those cookies are so cute. I love event planning too. I have a new blog about event planning www.eventsbytammy.blogspot.com and I would love your comments. Thanks!
ReplyDeleteSo pretty! I don't know if I could bring myself to bite into it though...lol... too pretty :) Thanks for the great tutorial! Kirsten
ReplyDeleteThese cookies are beautiful and you wrote such a great tutorial!
ReplyDeleteI love the cookies, thank you for sharing on how to make them. Congrats on being featured on Amy Atlas's blog!
ReplyDeletecheers,
Leoni
these look so yummy--my mouth is watering. So cool!
ReplyDeleteThese look amazing, what a great how to!
ReplyDeleteThese cookies are really quite amazing! I'm a new follower and I have really enjoyed roaming through your site. I can't wait to try some of the decorating ideas you have here! I wanted to let you know I have an award for you...actually three over at Sunny Bug. Congrats! ~Liz
ReplyDeletehttp://sunnybugworld.blogspot.com/2010/08/lovely-versatile-fabulous-sugar-doll.html
Those are the best hibiscus cookies I've ever seen!
ReplyDeleteBeautiful, beautiful, beautiful. Your emails always brighten up my day!
ReplyDeleteThis comment has been removed by the author.
ReplyDeleteI love your blog. I found you on facebook. I only make cake pops but would love to learn how to make cookies. Your cookies look fantastic.
ReplyDeleteHow can i order some from you!
ReplyDeleteBella! All the four leaf clover cookies cutter are a little different... which brand did you use for your hibiscus flower?
ReplyDeleteLori @ purplesageoriginals.blobspot.com
Thank you so much for your fantastic tutorial! My hibiscus cookies came out so cute, and my customer was very pleased.
ReplyDelete*I used a star cutter and rounded the points off with a pizza cutter*